Rainy Days and Mondays…*

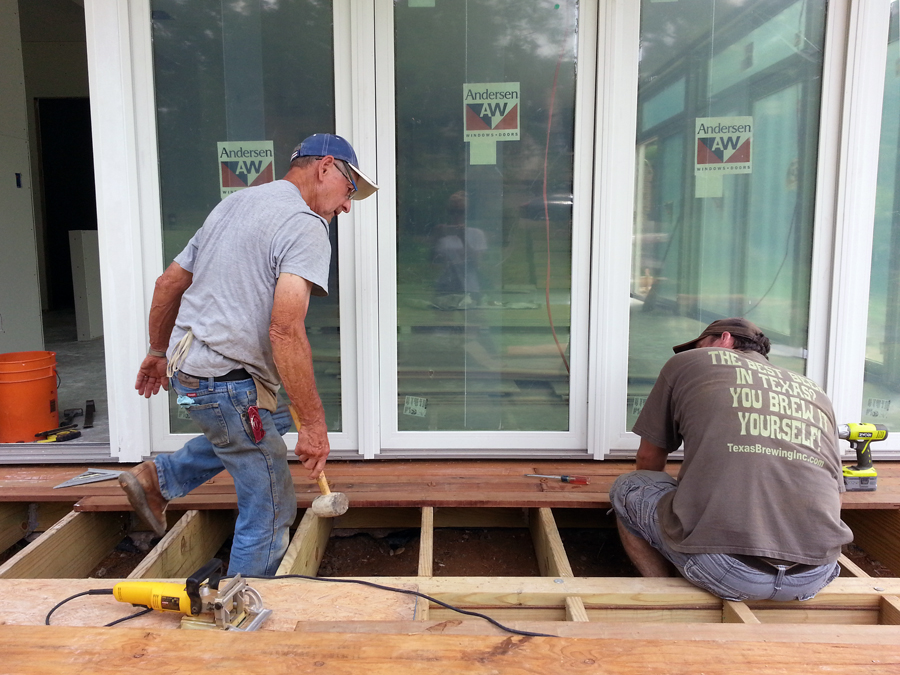
I never expected to have to work around rain delays when we started this project. Partly because this project began two years ago – smack dab in the middle of one of the worst droughts in our state’s history – but also because, droughts aside, summer in Texas is not known for its rain showers.

I like to think this project got the attention of the weather gods and since they have silly, mischievous senses of humor the lakes around North Texas filled up a bit while they inflicted rain upon our little project. You’re welcome. For the record, we will not be able to help out during the next drought. This is it for us.

The last storms that affected us directly happened when we were painting the outside of the house. Mark took a week off from work and two full days of painting were lost to rain. He figured out a way to salvage the time by building the framework for the fireplace himself (relatively easy work since he’s the one who designed it). Take that, weather gods!

We still have much to do with the fireplace, but the pictures at the end of this post will give you a good idea of how this thing will look.

In the beginning – father-in-law cipherin’ measurements very early on Day One of Project: Fireplace.

20140612_072137

Then the fun stuff starts!

20140612_105338

20140612_112034

20140612_114917

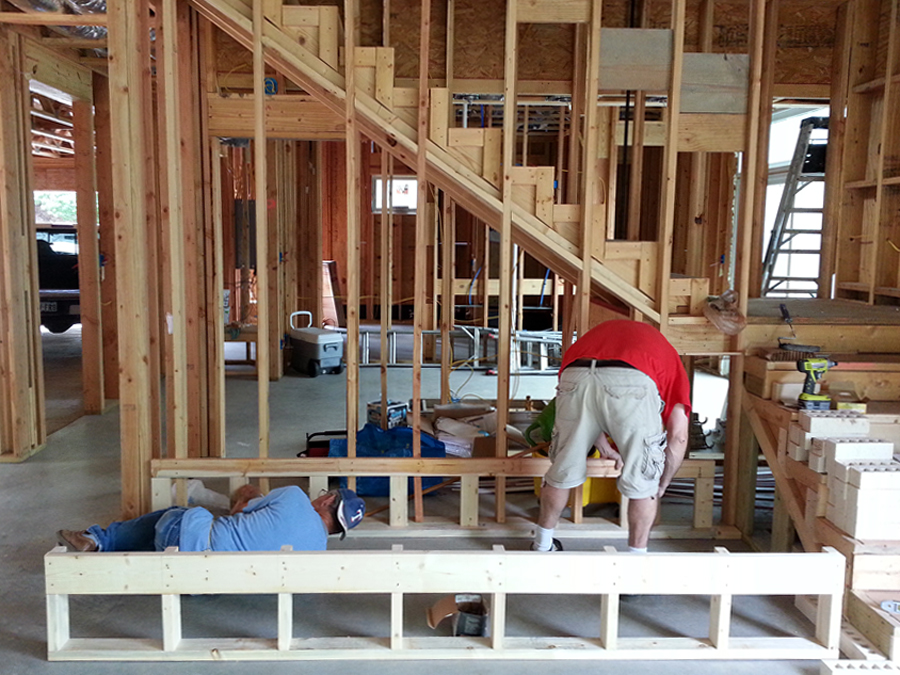
Disclaimer: No fathers-in-law were hurt during this construction.

20140612_115954

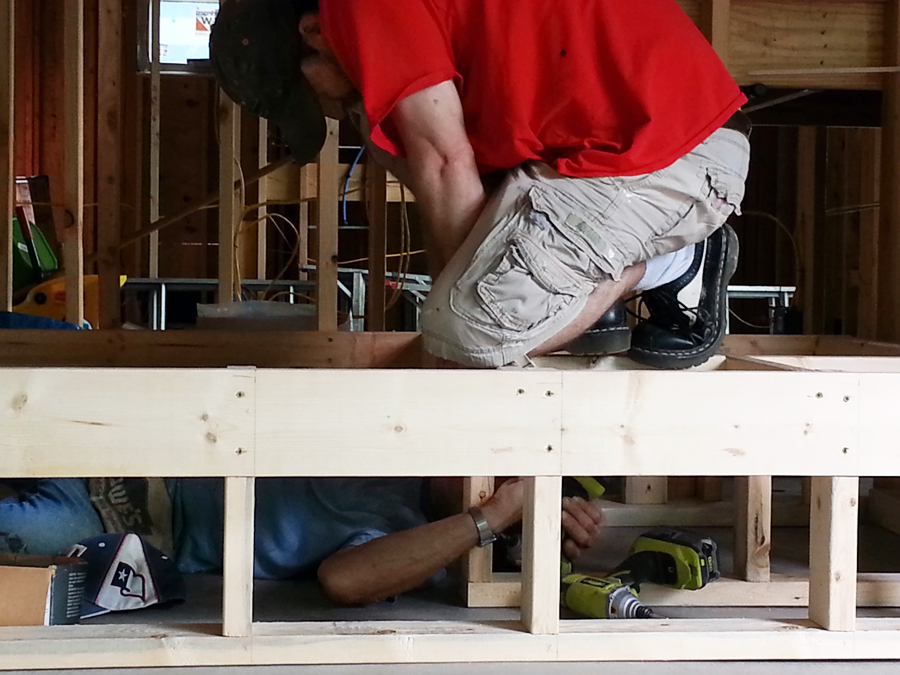
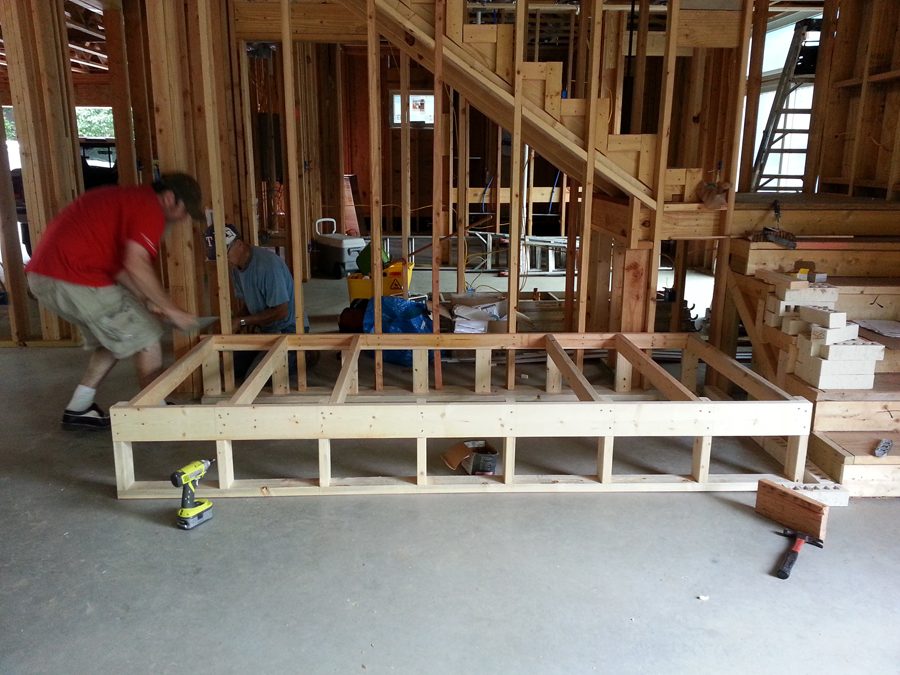
Mark works out the depth of the columns (real world applications are sometimes different from CAD drawings).

20140612_132843

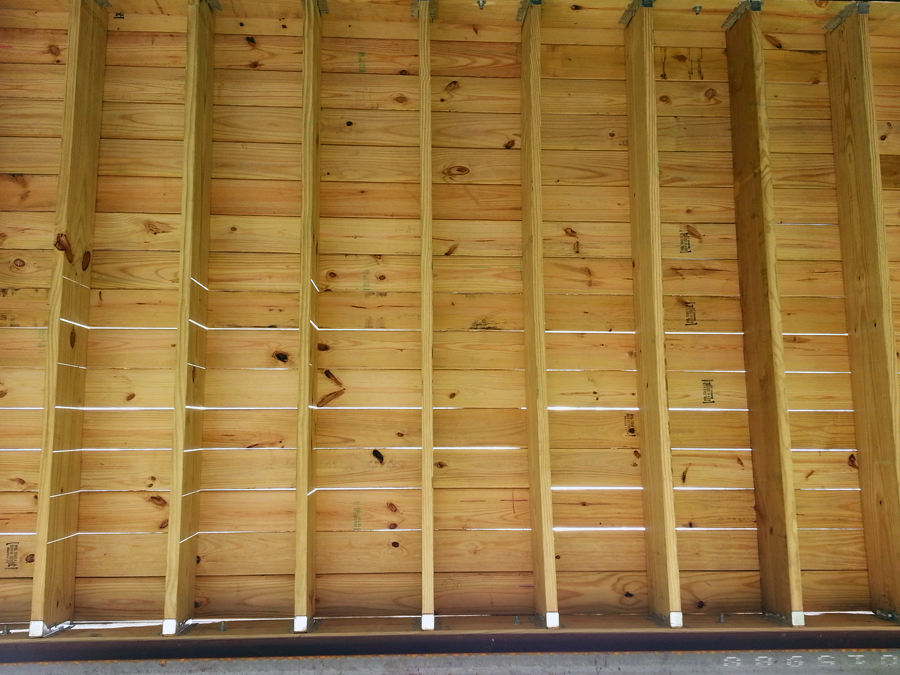
Building the structure vertically.

20140612_142021

20140612_141925

Inspecting the work at the end of Day One.

WP_20140612_15_16_15_Pro

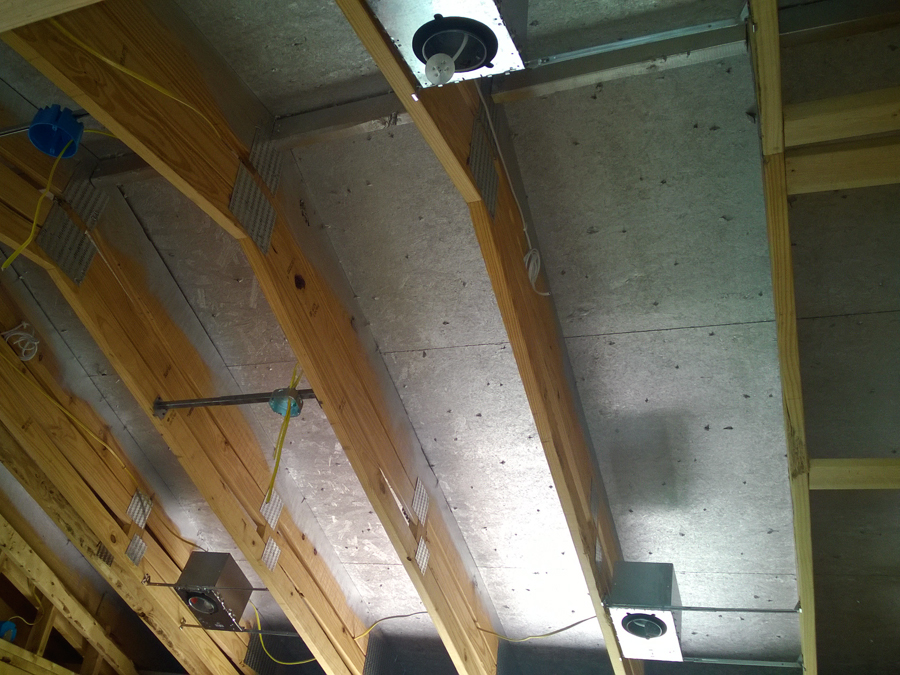
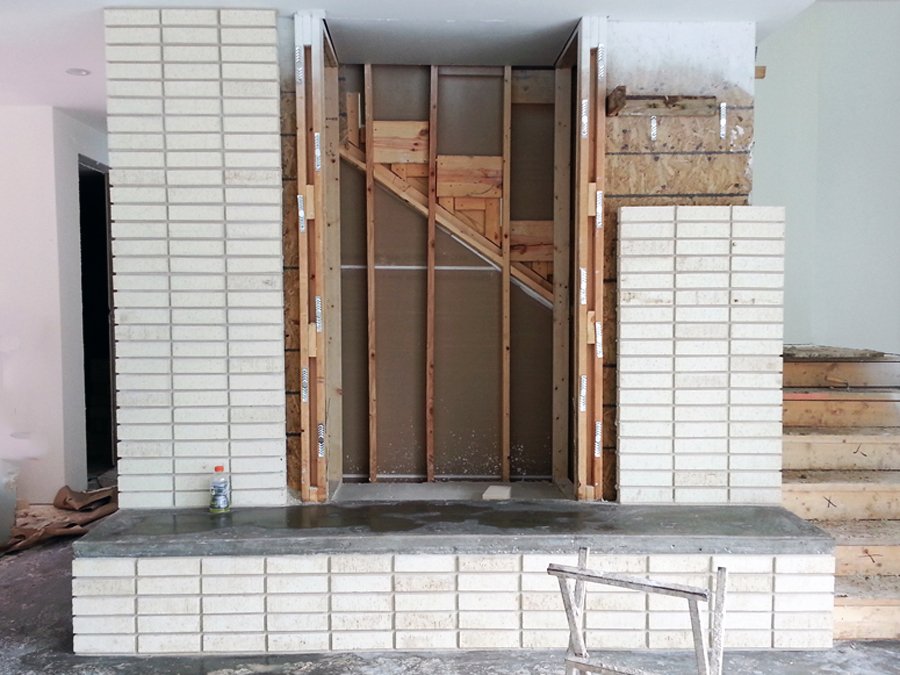
Day Two – it gets wrapped in OSB (Oriented Strand Board – not Oriental Strand Board) for strength…

WP_20140613_15_12_48_Pro

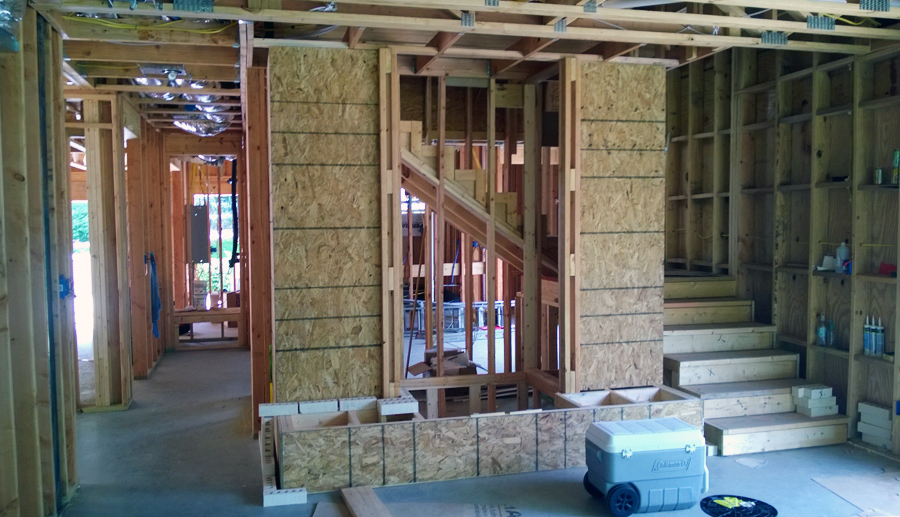
…and Mark sorts out brick placement and the width of mortar joints.

20140622_134542

By this point, the rain let up and we were able to return to our paint buckets.

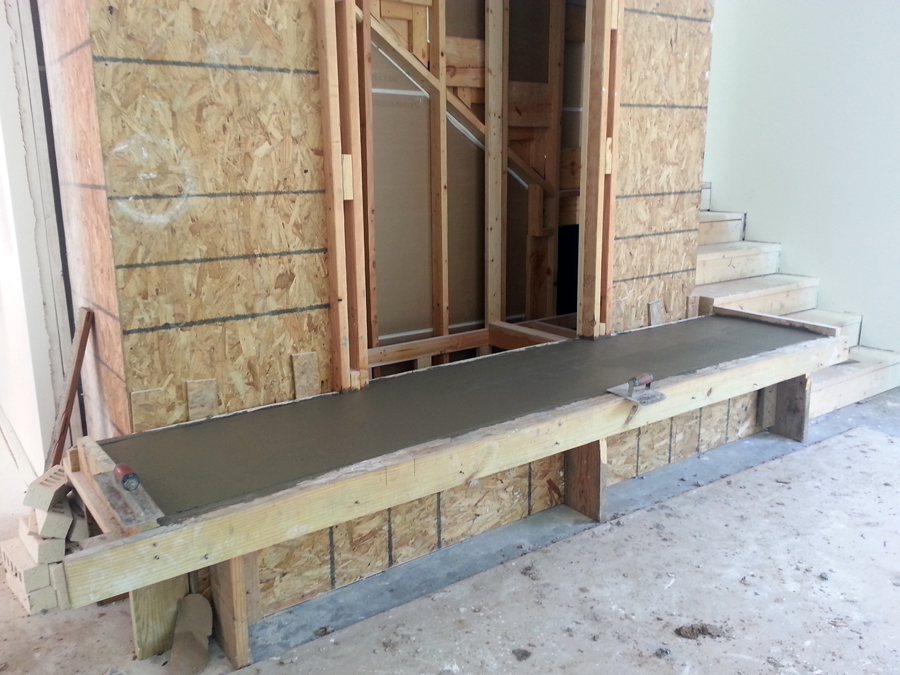
Several weeks later, sheetrock went up and the concrete guys built a frame for the hearth (they were also on-site to build frames for steps outside the sliding doors and the front porch – but we’ll talk about those things in a future post).

20140710_070613

A couple of weeks after that, they poured the concrete.

20140715_143701

Around this time, the brick masons started their work on the outside of the house. They, too, felt the wrath of the weather gods, so they, too, moved indoors to work on the fireplace during rain (it’s important to reiterate that this is JULY IN TEXAS).

20140717_164548

20140717_170438

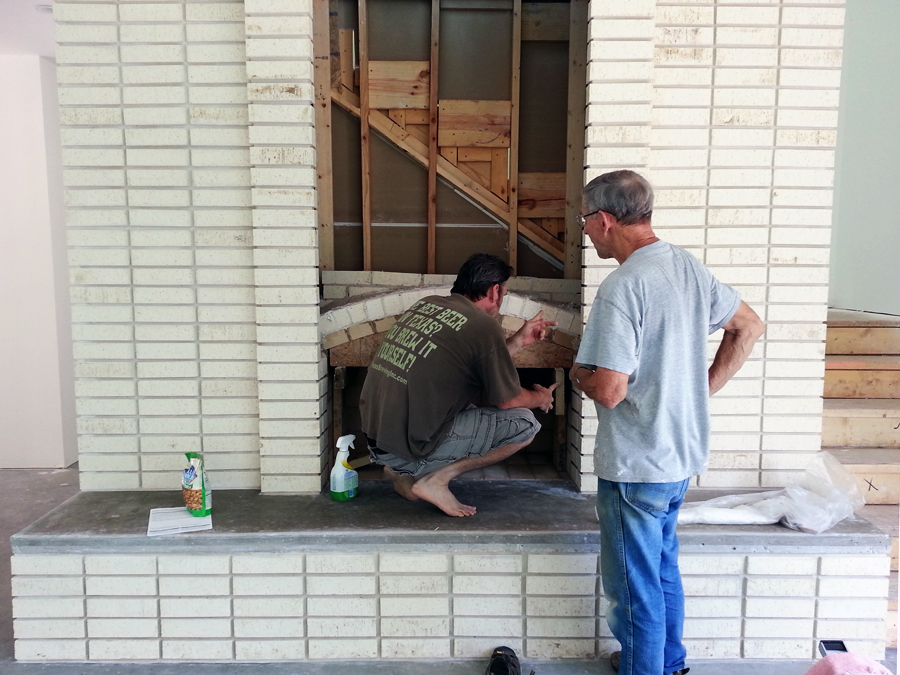
Instead of a pre-made firebox, the brick masons custom-built one to Mark’s specifications. We lovingly referred to the fireplace as the ‘pizza oven’ during this phase.

WP_20140718_16_55_04_Pro

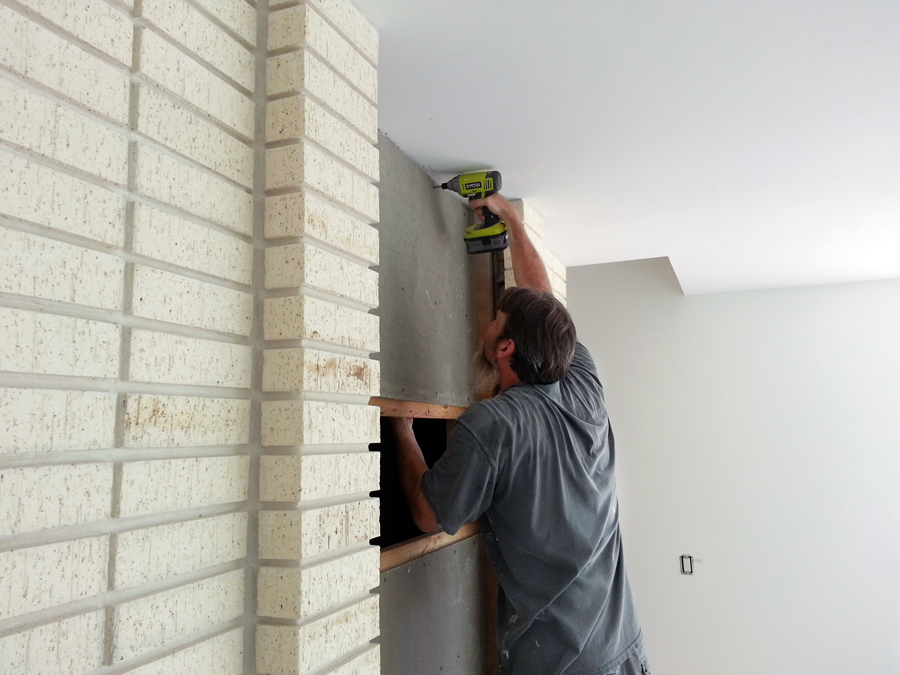
Once they finished the firebox, Mark started his work on the placement of the cement board to hold the tiles that will eventually be the focus of the fireplace.

20140720_154530

Right around this time the plumbers ran a line for gas.

Side conversation: No, we don’t plan to use wood logs in this thing. It’s meant for decorative purposes 98% of the time. The other 2% – Thanksgiving and Christmas – should not be spent cleaning soot and ashes. Yes, we love wood fires and plan to have a proper fire pit outside, where homemade marshmallows stuffed on the ends of twigs can melt into sticky, stringy globs and water from the cement pond can thoroughly douse any burning embers.

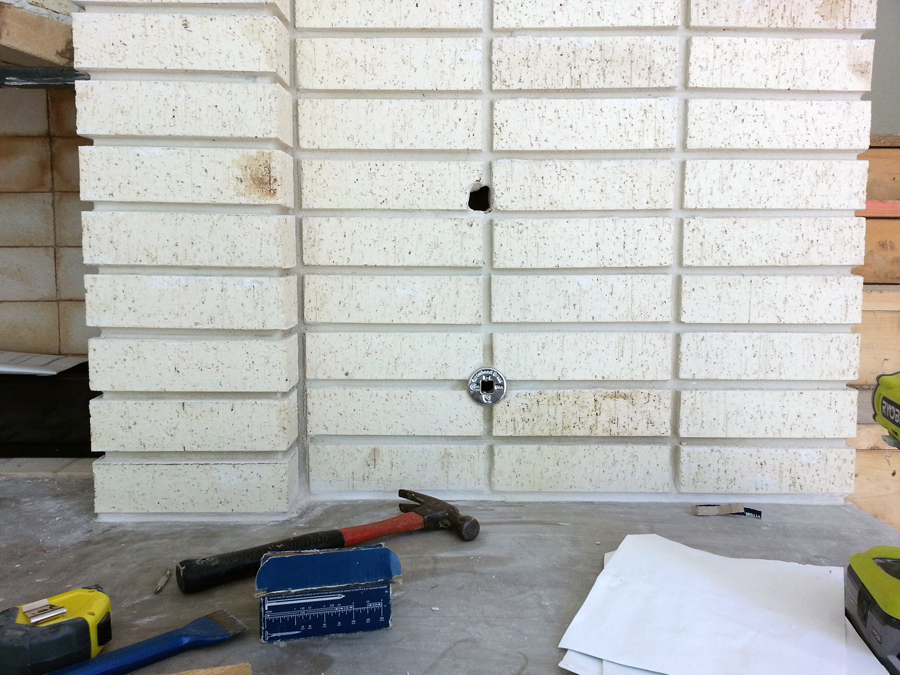
Back to the plumbers – Mark was not happy with the location they chose for the cut-off valve. Please note it is now both lower and centered squarely on the corners of the bricks. I could dedicate a whole post to OCD tendencies.

20140724_174745

In case you’re wondering: Yes, that’s dirt on those bricks. They sat on-site for eleven months. I think they’re pretty clean considering.

Here’s a peek inside. I call this its Mullet Phase – you know, business in the front/party in the back. If you’re curious, the brick masons used the busted up pieces for fortification purposes.

20140724_175037

Work on the cement board fittings continued as Mark and his dad added braces followed by the board.

20140724_175030

20140724_180531

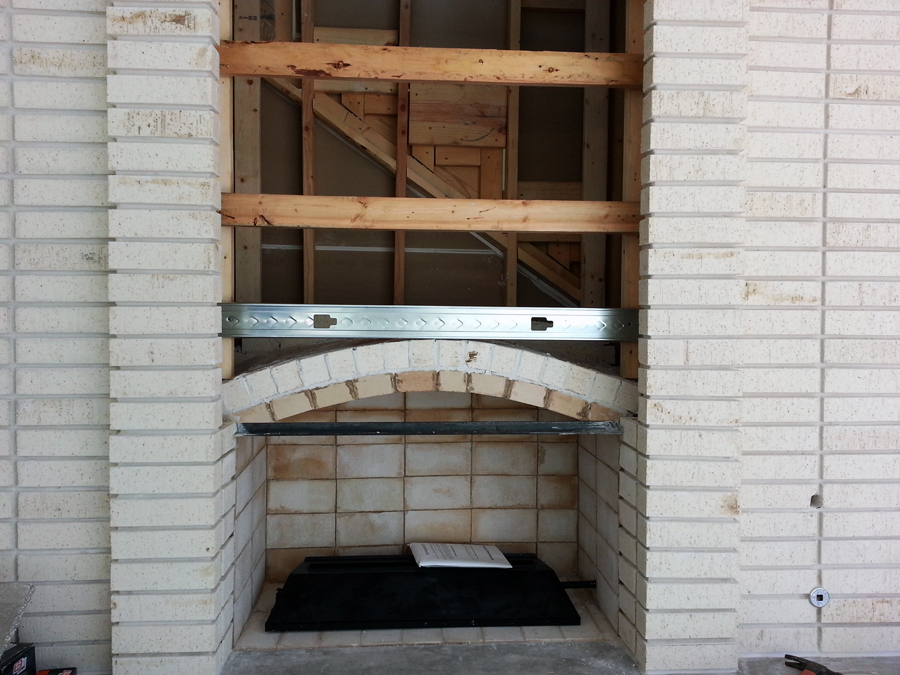
The masons then covered the “party” brick with “business” brick, effectively killing any links to the mullet/pizza oven.

IMGP2048

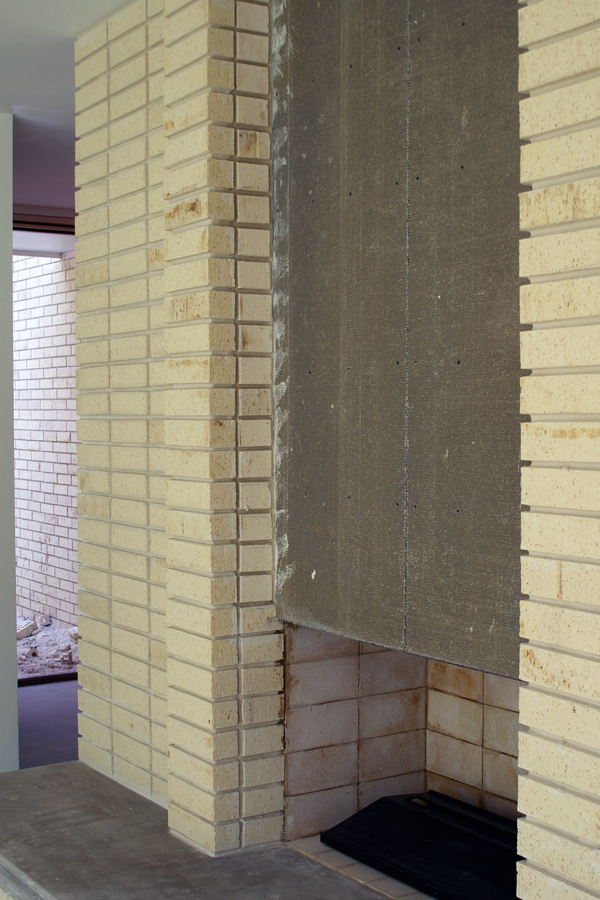
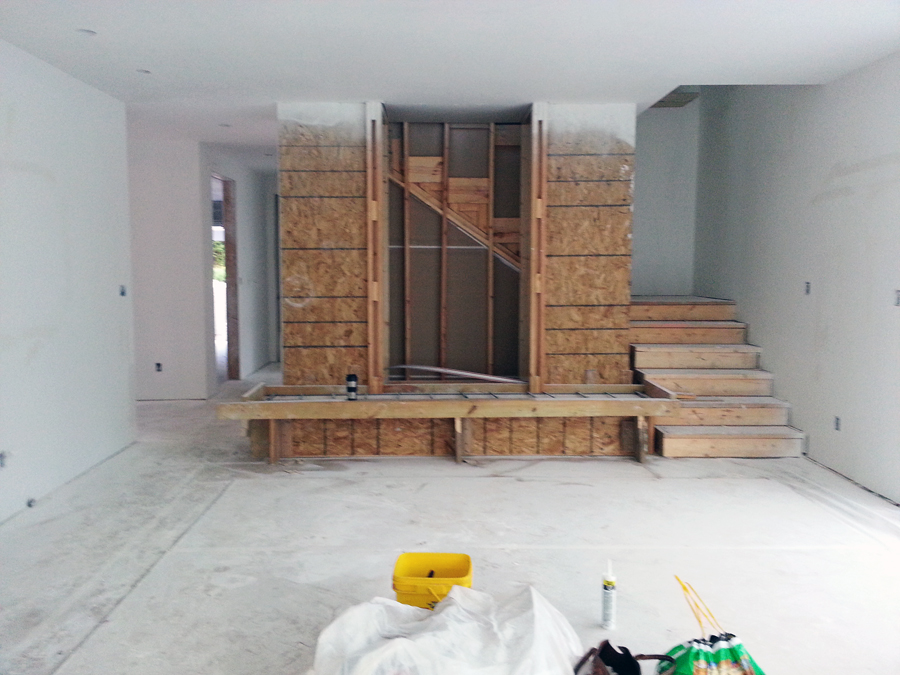
Here’s how it looks today. There’s still a lot of work to do – namely, we must make the ceramic tiles to fill the center. I’m looking forward to that part because we’ll work with our dear friend Keith Thomson from the Firehouse Gallery. We own some of his work already, but I like the idea that he will be a permanent part of this home.

IMGP2043

In closing, I give Mark my most heartfelt thanks for his infinite patience as I vacillated between we-must-have-a-mantle(!) and do-we-really-need-a-mantle(?!) exactly twenty times a day for the past fourteen months. The man is a saint.

* Blatant use of a Carpenters song seemed appropriate for this carpentry-heavy post.

Deck, Part Deux

The last time this blog visited this deck, it looked something like this:

WP_20140615_08_33_25_Pro

Mark took two weeks off recently. That’s in addition to the week he took off when we painted the outside. He has a ridiculous amount of vacation (that’s one of the reasons we thought we could tackle such an ambitious project).

He spent Week One on the deck while the crew installed sheetrock, taped, and textured inside. He spent Week Two painting indoors, but you’ve already seen that.

Here’s Day One of Deck Work. A lot of prep happened before they laid the first board. Mark wanted a specific type of wood and he didn’t want to see screws. Those stipulations turned a 2-day project into a full week’s worth of work. It was worth it, though. The thing is gorgeous.

20140628_153712Side note: We all have well-earned farmers’ tans now.

In the picture below, Mark shows us how to use the biscuit joiner.

20140628_153541

You make a small incision in the side of the board then insert a clip and nailed it to the joist. The board next to it gets an incision too and it’s pushed onto the clip that’s already nailed in. They say a picture is worth a thousand words:

20140629_165033

This process is both painful and time consuming, but it results in a surface free of visible screws or nails, which makes Mark happy.

Mini-conference – most likely regarding the length of the next board.
20140628_153506

The part of the deck you see in the picture above was easy peasy work. Sure, it was a pain to high step over all those joists – many a shin scar earned here – but compared to working on the section over the water this was a cakewalk.

20140628_162108

See, using the ground as leverage to get the boards in tight on the ‘land side’ was good.

20140629_163851

Doing the same thing over the water – not so good.

20140629_165952

They made their way, slowly but surely.

20140630_143621

WP_20140702_001

The Cement Pond god requested sacrifices so we offered up a couple of tools. Not sure what harm he could have inflicted upon us if we chose not to contribute to his cause, but better safe than sorry, right? (I’m really curious to see what turns up when we do a proper draining and cleaning of this thing…at least thirty years, or four feet, of muck in the bottom should make for a fun archaeological dig.)

20140701_112235

This little part of the deck was trickier than I ever imagined.

WP_20140703_002

While taking a break from deck work, father-in-law spotted a large soft shell turtle digging a nest on the “lake” side of the property. She spotted him at the same time and her attempt to quickly and gracefully high tail it outta there failed as she slid down the bank and landed on her back in a couple of inches of water. Fortunately, one of the deck planks was long enough for Mark to reach her and flip her over without having to get too close. Since Mark saved her life, I told him he earned naming rights. So everyone, meet Cat the Turtle (or more specifically, Cat the Turtle’s belly – or, if you want the anatomically correct word, her plastron). I’m hopeful this experience didn’t mess up her egg laying process. I plan to keep an eye out for her kittens in a couple of months. Had I been on hand for this li’l adventure, you would see pictures of the rescue itself. Instead, you just get this:

WP_20140702_09_55_58_Pro

Back to the deck – who knew walking on a solid surface could bring such joy?

WP_20140703_003

Once they attached the trim pieces the next phase of this project started – painting the structural steel to help protect it from the elements and to make it look pretty. Although, if we do our job right it won’t really look pretty, it’ll just disappear.

First we cleaned the metal, then Mark ground down nails used to hold the joists in place then came the primer. This is nasty stuff and I apologized to every minnow that thought a tiny drip was an insect landing on the water.

20140706_192055

I have a newfound appreciation of the men and women who paint bridges. This is not easy work.

My arms were too tired to snap an action shot of the final coat of black paint going on, but here’s a good before and after:

nail grind

Even though it’s nasty stuff, we’re quite happy with Rust-Oleum® industrial strength rusty metal primer – specifically, the way it adhered to the steel. Fingers crossed it holds up well because I do not want to paint this thing again.

But that’s not all!

Work began immediately on the balcony. Fortunately, Mark’s stringent wood and screw requirements didn’t cover the upper deck so this work went remarkably fast.

This is how we worked on the balcony before:

20140608_142305

If you look closely at the picture above, you can see father-in-law’s hand while he caulked the board and batten. I took this photo during one of my ‘spells’ – which is just code for taking a break, lying flat on my back and staring up at the sky for a while. I’m not cut out for the work of a day laborer.

This is how it looks today. Yes, railing is planned. We’re not crazy.

20140705_115645

It’s so much easier to work out there now!

20140719_090310

Here’s the view from another spell.

20140705_131058

The team who put the joists in place made a few placement mistakes, so Mark used the grinder to smooth the holes and his dad filled ‘em in with Bondo®. Once I painted the beam with primer, it’s practically impossible to see where they were.

20140707_114759

20140724_145011

I’m confident it’ll look even better with the final coat of paint. There’s a lot more work to do – most importantly, welding pieces meant to attach the upper balcony railing. We have a special guest star for that job, so check back in a couple of weeks to see how things turn out.

Then we must finish painting the underside of the balcony and stain/seal the wood on top too. Finally, we will sand and oil the ipe on the deck below but that won’t happen until the brick masons finish their work.

In the meantime, I leave you with a picture taken yesterday:
20140724_164951

One tiny step at a time.

Neither Rust-Oleum® nor Bondo® sponsored this post but we give ’em both our seal of approval.

Insulation, Sheetrock, and Beer Bellies

A lot has happened in the last few weeks!

For many months the walls looked like this:

20140616_072502

The framers constructed the exterior walls with both normal vertical supports and these great little horizontal pieces (we’re not 100% sure, but I think the horizontal ‘studs’ are there for fire retardation…building code stuff).

Regardless of the reason they’re there, we grew to love those useful little nooks.

20140614_075324

We loved them so much we added more of our own. Here’s Mark building shower niches into the wall.

20140618_171902

When someone said, “The bug spray is in the medicine cabinet” we knew just where to go. For a long time it felt as if we had moved in. Who needs proper walls? Who needs electricity? Who needs running water when we have all these bottles of the stuff (and a port-a-potty)?

20140612_110506

Homebuilding, the way we’re doing it, will make you crazy. Specifically, this definition of schizophrenia: emotional blunting, intellectual deterioration, social isolation, disorganized speech and behavior, delusions, and hallucinations.

Delusions ran high at this point.

(Disorganized speech comes later – don’t worry, you’ll get to read about that too. I expect to be in full hallucination mode by the time this thing is finished. Social isolation is the worst though. We miss seeing our friends. )

Then insulators did their thing and we were snapped back into reality.

20140618_170018

The crew sprayed a radiant barrier on the interior upstairs roof and it dropped the temperature immediately. Radiant barriers rock.

WP_20140615_16_25_43_Pro

A member of our team had a bit of food poisoning, but carried on like a trooper regardless. Pepto-Bismol® and traditional insulation are practically the same color. It took an hour to find those tablets.

20140618_173906

We insulated the garage ourselves. I’ve never lived in a house with a properly functioning garage. I am all sorts of excited about this thing.

20140622_145039

In the meantime, the sheetrock arrived…

20140616_175313

20140616_191621

…and it went up.

20140626_164219

20140626_165558

20140626_170053

20140626_170110

Well, a lot of it went up – a lot went down too. This is very messy work, folks.

20140626_164803

There are no pictures of the taping & bedding process. Mostly because finishing the deck consumed our attention while they did their thang, but also because they were incredibly large, half-naked men on stilts (thankfully it was the top half). Unlike some other tradesmen who shall remain nameless, these guys always showed up on time and they did a great job. After they wrapped up their work, I realized how much I miss their falsetto sing-alongs with techno mariachi music. It’s a quieter and less interesting place without them. I do not, however, miss the sweaty, naked beer bellies at eye level.

Next up, the texture guy – who remained fully clothed the whole time. He had his work cut out for him because we paid for completely smooth walls. It might not seem obvious at first, but the smoother the wall, the more work is involved. Texture covers up a multitude of sins.

By this point, we finished the deck and were ready to start our next job – painting inside. The texture guy was a fountain of knowledge and we’re grateful he shared some of it with us. For example, who knew buying plastic sheeting and tape at Kelly Moore was considerably cheaper ($11) than The Home Depot or Lowes ($25) for the same products?

20140707_200242

And he gave us a tutorial on how to make quick work of prepping.

20140707_152344

I don’t want to relive the nightmare of our first round of paint (it soaked straight into the walls, gallon after gallon after five gallon bucket – who knew painting new construction would be such a freakin’ headache?), so I’ll just skip right to the fun pictures.

Father-in-law worked the paint sprayer in about fifteen layers of clothes on a 100 degree Fahrenheit day. God bless that man.

20140709_111840

Gunfight in the hall.

20140712_091729

Teamwork.

20140712_094840

Still smiling (and looking ridiculously cute) at the end of a long day. We’re so fortunate to have this man on our team.

20140709_112222

It’s coming along. Slowly but surely.

20140614_075050

20140626_164526

20140714_112343